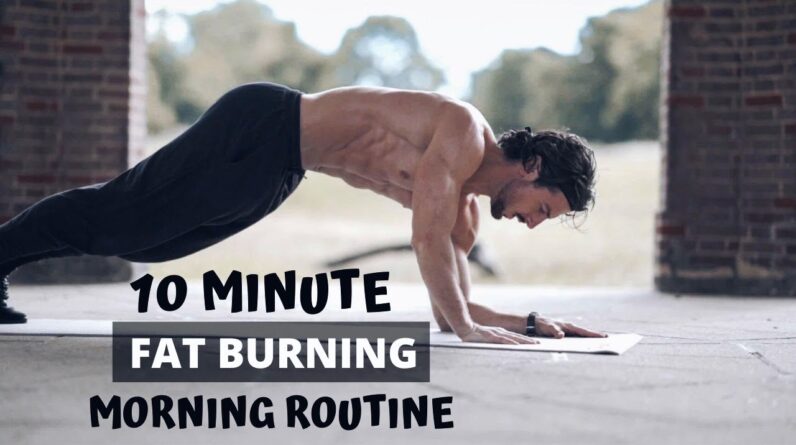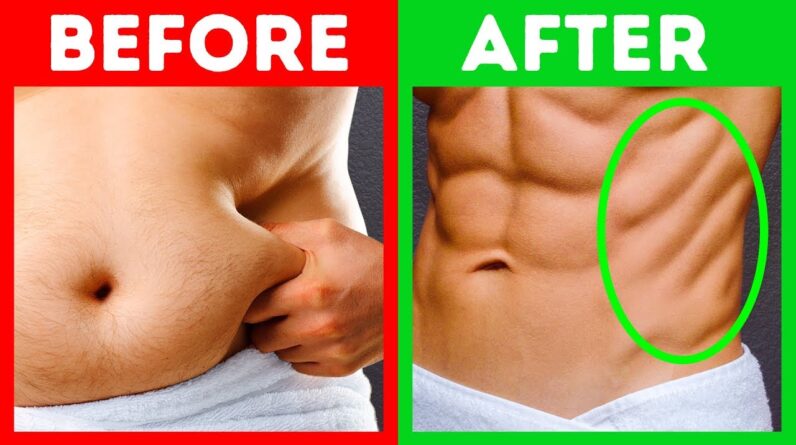
Are you tired of promising yourself that you’ll start taking care of your body “tomorrow”? Well, if you’re looking for a sign to get rid of those love handles and feel more confident, this is it. In this article, you will find 8 simple exercises that you can do at home to lose those stubborn love handles without stepping foot in a gym. The exercises target different muscles in the abs, obliques, back, glutes, chest, and hamstrings, providing a full body workout. Along with the exercises, the article also suggests making dietary changes such as avoiding processed and fried foods, sweetened drinks, fast food, junk food, and fatty meats. So, why wait? Give these exercises a try and start chiseling your waistline today!

Jumping Burpees
Jumping burpees are a fantastic exercise that can take your workout to the next level. Not only do they provide a great cardiovascular challenge, but they also target multiple muscle groups, making them a highly effective full-body exercise. In this section, we will explain how to perform jumping burpees correctly, discuss the muscles they target, and provide some tips for making the most out of your jumping burpees.
How to Do Jumping Burpees
To perform jumping burpees, start by standing with your feet shoulder-width apart, and your arms relaxed by your sides. Then, follow these steps:
- Begin by squatting down, lowering your hands to the floor in front of you.
- Kick your feet back and assume a high plank position, with your body in a straight line from head to toe. Engage your core to maintain stability.
- Quickly jump your feet back up to your hands, returning to the squat position.
- From the squat position, jump explosively into the air, reaching your arms overhead.
- Land softly and go right back into the next repetition by immediately squatting down and placing your hands on the floor again.
Remember to maintain a smooth, controlled motion throughout the exercise to maximize its effectiveness.
Muscles Targeted by Jumping Burpees
Jumping burpees are a compound exercise that targets several major muscle groups in the body. Here are the primary muscle groups worked during jumping burpees:
-
Quadriceps: The squatting and jumping motions in burpees engage and strengthen the quadriceps muscles, which are located on the front of your thighs.
-
Glutes: The explosive jump at the end of each repetition activates the glute muscles, helping to tone and strengthen the buttocks.
-
Hamstrings: As you kick your feet back into the high plank position, your hamstrings contract to control the movement and maintain stability.
-
Core: Jumping burpees engage the core muscles, including the rectus abdominis, transverse abdominis, and obliques, to stabilize the body and maintain proper alignment.
-
Chest and Shoulders: The push-up portion of the burpee engages the chest and shoulder muscles, helping to build strength in the upper body.
-
Calves: The jumping motion recruits the calf muscles, providing additional toning and strengthening benefits.
Tips for Effective Jumping Burpees
To get the most out of your jumping burpees, keep the following tips in mind:
-
Focus on form: Proper form is crucial to ensure you engage the correct muscles and minimize the risk of injury. Keep your core tight, maintain a straight line from head to toe in the plank position, and land softly when jumping.
-
Start at your own pace: If you’re new to burpees or have any physical limitations, start with a modified version or perform the exercise at a slower pace. As you build strength and endurance, gradually increase your speed and intensity.
-
Breathe properly: Remember to breathe throughout the movement. Inhale during the easier parts of the burpee, such as the squat and the plank, and exhale during the more challenging parts, like the jump and the push-up.
-
Modify if needed: If you find the full jumping burpee too challenging, you can modify the exercise by eliminating the jump or the push-up. Find a variation that suits your fitness level and gradually progress as you become stronger.
By following these tips and incorporating jumping burpees into your fitness routine, you can experience improved strength, endurance, and overall fitness.
Bicycle Crunches
Bicycle crunches are a dynamic ab exercise that targets the rectus abdominis and obliques, helping to strengthen and tone your midsection. In this section, we will break down how to perform bicycle crunches correctly, discuss the muscles they target, and offer some tips to maximize their effectiveness.
How to Do Bicycle Crunches
To perform bicycle crunches, follow these steps:
- Start by lying flat on your back, with your hands placed lightly behind your head, and your legs extended.
- Lift your feet off the ground, bending your knees at a 90-degree angle.
- Engage your core and bring your right knee towards your chest while simultaneously lifting your chest and rotating your left elbow towards your right knee. Aim to touch your elbow to your knee or get as close as possible.
- As you extend your right leg back to the starting position, switch sides by bringing your left knee towards your chest and rotating your right elbow towards your left knee.
- Continue alternating sides in a fluid, bicycle-like motion, while keeping your core engaged and your lower back pressed into the floor.
It’s important to maintain a slow, controlled movement throughout the exercise to effectively target the abdominal muscles.
Muscles Targeted by Bicycle Crunches
Bicycle crunches primarily target the rectus abdominis, often known as the “six-pack” muscles, and the internal and external obliques. Here’s how each of these muscle groups is engaged during bicycle crunches:
-
Rectus Abdominis: Bicycle crunches recruit the rectus abdominis muscles, located between the ribs and the pelvic bone. These muscles help flex the spine and provide stability to the core.
-
Obliques: The internal and external oblique muscles, which run along the sides of your waist, are highly engaged during bicycle crunches. These muscles assist in rotating and flexing the trunk, allowing for the twisting motion required for this exercise.
Tips for Effective Bicycle Crunches
To make the most out of your bicycle crunches, keep these tips in mind:
-
Maintain proper form: Focus on your form throughout the exercise. Keep your lower back pressed into the floor, avoid pulling on your neck, and engage your core to prevent strain on your lower back.
-
Breathe correctly: Coordinate your breathing with the motion. Exhale as you twist your torso and bring your elbow towards your knee, and inhale as you return to the starting position.
-
Control the movement: It’s important to control the speed and range of motion during bicycle crunches. Avoid rushing through the exercise and ensure that you feel a strong contraction in your abs with each repetition.
-
Avoid pulling on your neck: Instead of interlacing your fingers behind your head, try placing your hands lightly at your temples or across your chest. This will help prevent strain on your neck and encourage your core muscles to do the work.
By following these tips and incorporating bicycle crunches into your workout routine, you can strengthen and sculpt your abdominal muscles, contributing to a stronger core overall.
Kneeling Vacuum
The kneeling vacuum is an exercise that targets the deep transverse abdominis muscle, often referred to as the body’s natural corset. By practicing the kneeling vacuum, you can enhance core strength and stability. In this section, we will guide you through how to perform kneeling vacuum correctly, discuss the muscles it targets, and share tips for maximizing its effectiveness.
How to Do Kneeling Vacuum
To perform the kneeling vacuum exercise, follow these steps:
- Start by kneeling on all fours, with your knees directly under your hips and your hands directly under your shoulders.
- Take a deep breath in through your nose, allowing your belly to relax and expand.
- As you exhale through your mouth, engage your core muscles by pulling your belly button in toward your spine. Imagine scooping out your abdominal contents and increasing the hollow space around your midsection.
- Hold the contraction for a few seconds, maintaining a steady breathing pattern during the hold.
- Release the vacuum and repeat for the desired number of repetitions.
Remember to focus on the quality of the contraction rather than the quantity of repetitions. It’s more effective to perform a few high-quality vacuums than many shallow ones.
Muscles Targeted by Kneeling Vacuum
The primary muscle targeted by the kneeling vacuum is the transverse abdominis, which is the deepest layer of the abdominal muscles. Here’s why this muscle is significant:
Transverse Abdominis: The transverse abdominis wraps around the torso like a corset, providing stability and support for the spine and organs. By strengthening the transverse abdominis, you can improve core stability, posture, and overall strength.
Tips for Effective Kneeling Vacuum
To ensure the kneeling vacuum is performed effectively, keep the following tips in mind:
-
Focus on the contraction: Emphasize the pull of your belly button toward your spine during the exhalation phase of the exercise. Visualize tightening the corset of muscles around your midsection.
-
Keep the rest of your body stable: While performing the kneeling vacuum, maintain a neutral spine and avoid arching your back or hunching your shoulders. Focus on engaging only the abdominal muscles and keep the movement isolated to the core.
-
Progress gradually: If you find the kneeling vacuum challenging at first, start with shorter holds and gradually increase the duration as your core strength improves. Over time, you can also experiment with performing the exercise in different positions, such as standing or sitting, to further challenge your core stability.
-
Consistency is key: To reap the benefits of the kneeling vacuum exercise, it’s important to incorporate it into your regular fitness routine. Aim to practice the exercise at least a few times per week, gradually increasing the intensity as you become more comfortable.
By incorporating kneeling vacuums into your core training routine, you can strengthen the deep abdominal muscles and enhance core stability, leading to improved posture and overall functional strength.
Side Plank
Side plank is a challenging yet highly effective exercise that targets the core muscles, including the obliques and transverse abdominis. By incorporating side planks into your fitness routine, you can enhance core strength, improve stability, and increase overall body control. In this section, we will provide a step-by-step guide on how to perform side planks correctly, explain the muscles they target, and offer tips for optimizing your side plank workout.
How to Do Side Plank
To perform a standard side plank correctly, follow these steps:
- Start by lying on your side, with your legs fully extended and stacked on top of each other.
- Place your lower forearm on the ground directly below your shoulder. Your elbow should be positioned at a 90-degree angle.
- Ensure your body is in a straight line, with your shoulders and hips stacked on top of each other.
- Engage your core by drawing your navel in towards your spine.
- Press through your forearm and the side of your bottom foot, lifting your hips off the ground until your body forms a straight line from head to toe.
- Maintain this position for the desired amount of time, aiming for at least 20-30 seconds as a starting point.
- Repeat on the other side.
Muscles Targeted by Side Plank
The side plank primarily targets the following muscles:
-
Obliques: The side plank is known for its ability to engage and strengthen the internal and external oblique muscles, which run along the sides of your waist. These muscles help with rotational movements and lateral flexion of the spine.
-
Transverse Abdominis: The transverse abdominis muscle, which wraps around the midsection like a corset, is also heavily engaged during side planks. This muscle is responsible for stabilizing the spine and providing core strength.
Tips for Effective Side Plank
To make the most out of your side plank workout, consider the following tips:
-
Maintain proper alignment: Focus on keeping your body in a straight line throughout the exercise. Avoid sagging or bending at the hips or letting your shoulder drop forward. Imagine being squeezed between two walls to encourage proper alignment.
-
Engage your core: The key to an effective side plank is engaging your core muscles. Imagine pulling your navel towards your spine and actively squeezing your obliques while holding the position.
-
Start with modified variations: If you’re new to side planks or find the exercise challenging, you can start with modified variations. Instead of lifting your hips off the ground, maintain the starting position and focus on engaging your core muscles. Gradually progress to the full side plank as your strength improves.
-
Breathe properly: Maintain a steady breathing pattern throughout the exercise. Inhale deeply through your nose before starting the movement, and exhale slowly and fully as you hold the position.
By incorporating side planks into your core workout routine, you can strengthen your obliques, improve core stability, and enhance overall body control.
Swimmers
Swimmers are a challenging exercise that mimics the motion of swimming, providing an effective workout for the back, shoulders, core, and glutes. By incorporating swimmers into your fitness routine, you can enhance your posture, improve upper body strength, and target multiple muscle groups simultaneously. In this section, we will guide you through how to perform swimmers correctly, explain the muscles they target, and share tips to help you maximize the benefits of this exercise.
How to Do Swimmers
To perform swimmers, follow these steps:
- Start by lying face down on a mat or exercise mat, with your arms extended in front of you and your legs fully extended.
- Lift your chest, arms, and legs off the ground simultaneously. This is your starting position.
- As you raise your chest and upper body off the ground, simultaneously lift your right arm and left leg higher than the opposite limbs.
- Lower your right arm and left leg back down to the ground, then lift your left arm and right leg higher than the opposite limbs.
- Continue alternating sides in a swimming motion, as if you are freestyle swimming or doing the front crawl.
Maintain a smooth and controlled motion, focusing on engaging the targeted muscle groups.
Muscles Targeted by Swimmers
Swimmers primarily target the following muscles:
-
Back muscles: Swimmers engage the muscles of the upper and lower back, including the erector spinae, latissimus dorsi, and rhomboids. These muscles help extend and stabilize the spine, improving posture and reducing the risk of back pain.
-
Shoulders: The deltoids, traps, and rotator cuff muscles are all activated during swimmers, providing a strengthening and stabilizing effect for the shoulder joints.
-
Core: The muscles of the core, including the rectus abdominis, obliques, and transverse abdominis, work together to stabilize the spine and maintain proper body alignment throughout the exercise.
-
Glutes: Swimmers engage the gluteus maximus, medius, and minimus muscles, helping to strengthen and tone the buttocks.
Tips for Effective Swimmers
To maximize the benefits of swimmers and perform them effectively, consider the following tips:
-
Maintain proper form: Focus on keeping your body aligned throughout the exercise. Avoid arching or sagging your back, and engage your core muscles to stabilize your spine. Keep your head in a neutral position to prevent straining your neck.
-
Engage the correct muscles: Concentrate on engaging the targeted muscle groups, including your back, shoulders, and glutes. Imagine actively pulling your shoulder blades together as you lift your chest and arms, and squeeze your glutes as you lift your legs.
-
Control your breathing: Coordinate your breathing with the movement. Inhale as you lower your limbs and prepare to switch sides, and exhale as you lift your limbs and perform the swimming motion.
-
Start at your own pace: Swimmers can be quite challenging, especially if you’re new to the exercise. Start with smaller movements and gradually increase your range of motion as you become more comfortable and stronger.
By incorporating swimmers into your strength training routine, you can target and strengthen multiple muscle groups, enhancing your overall fitness and posture.
Russian Twist
Russian twists are an effective exercise for targeting the obliques, which are the muscles on the sides of your waist. By incorporating Russian twists into your workout routine, you can enhance core strength, improve rotational stability, and sculpt the waistline. In this section, we will guide you through how to perform Russian twists correctly, explain the muscles they target, and offer tips for maximizing their effectiveness.
How to Do Russian Twists
To perform Russian twists, follow these steps:
- Start by sitting on the floor with your knees bent and your feet flat on the ground.
- Lean back slightly, keeping your core engaged and maintaining a straight back.
- Clasp your hands together in front of your chest or hold a weight or medicine ball to add resistance.
- Slowly twist your torso to one side, bringing your hands or the weight towards the ground beside your hip.
- Return to the center and twist in the opposite direction, bringing your hands or the weight towards the ground beside your other hip.
- Continue alternating sides in a slow, controlled motion throughout the exercise.
Focus on engaging your core muscles and maintaining proper form throughout the movement.
Muscles Targeted by Russian Twists
Russian twists primarily target the following muscles:
-
Obliques: The oblique muscles, including the internal and external obliques, are the primary muscles worked during Russian twists. These muscles help with rotational movements and lateral flexion of the spine, allowing you to twist from side to side.
-
Rectus Abdominis: The rectus abdominis, commonly referred to as the “six-pack” muscles, also play a supportive role during Russian twists. They help stabilize the spine and maintain proper posture throughout the exercise.
Tips for Effective Russian Twists
To get the most out of your Russian twists, consider the following tips:
-
Maintain proper posture: Focus on keeping your back straight and your core engaged throughout the exercise. Avoid rounding your back or slouching your shoulders, as this can strain your lower back.
-
Control the movement: Perform Russian twists in a slow, controlled manner, focusing on engaging your obliques with each twist. Avoid using momentum to swing your torso, as this can reduce the effectiveness of the exercise.
-
Breathe properly: Coordinate your breathing with the movement. Inhale as you center yourself and prepare to twist, and exhale as you twist your torso from side to side.
-
Start with bodyweight twists: If you’re new to Russian twists, begin by practicing the exercise without additional weight or resistance. As your strength improves, you can gradually add weight in the form of a medicine ball, dumbbell, or weight plate to further challenge your obliques.
By incorporating Russian twists into your core workout routine, you can strengthen and sculpt your waistline while enhancing rotational stability and overall core strength.
Woodchoppers
Woodchoppers are a highly effective exercise for targeting the obliques, core muscles, and upper body. With a motion that simulates the act of chopping wood, this exercise provides a functional and dynamic movement pattern that engages multiple muscle groups simultaneously. In this section, we will guide you through how to perform woodchoppers correctly, explain the muscles they target, and offer tips for maximizing their effectiveness.
How to Do Woodchoppers
To perform woodchoppers, follow these steps:
- Start by standing with your feet shoulder-width apart and your knees slightly bent.
- Hold a weight or medicine ball with both hands in front of your body, arms extended.
- Engage your core and twist your torso to one side, bringing the weight or ball down diagonally across your body.
- Pivot on your feet as you perform the twisting motion, allowing your hips to rotate as well.
- Keep your arms extended and control the movement as you bring the weight or ball back to the starting position.
- Repeat the movement on the other side, twisting in the opposite direction.
Maintain control and engage your core and obliques with each repetition.
Muscles Targeted by Woodchoppers
Woodchoppers primarily target the following muscles:
-
Obliques: The twisting motion involved in woodchoppers is an excellent way to engage and strengthen the oblique muscles. These muscles are responsible for rotational movements of the spine and help stabilize the core.
-
Core Muscles: Woodchoppers also engage the rectus abdominis and transverse abdominis, both of which are essential for core stability and strength.
-
Upper Body Muscles: The muscles of the upper body, including the deltoids, biceps, and triceps, are activated during woodchoppers. These muscles assist in controlling the weight or medicine ball and provide stability throughout the movement.
Tips for Effective Woodchoppers
To get the most out of your woodchopper exercise, keep the following tips in mind:
-
Start with a lighter weight: If you’re new to woodchoppers, begin with a lighter weight or medicine ball. Focus on mastering the form and range of motion before gradually increasing the resistance.
-
Engage your core: Prioritize engaging your core and oblique muscles as you twist and perform the chopping motion. Imagine driving the movement from your obliques to maximize muscle activation.
-
Maintain proper alignment: Throughout the exercise, ensure that your knees are slightly bent, your back is straight, and your shoulders are relaxed. Avoid hunching or arching your back and strive to keep your spine neutral.
-
Control the movement: Perform woodchoppers in a slow, controlled manner, emphasizing the quality of each repetition over speed. This will allow you to focus on engaging the targeted muscles and maximize the effectiveness of the exercise.
By incorporating woodchoppers into your workout routine, you can strengthen and sculpt your obliques, enhance core stability, and improve upper body strength.
Reverse Crunches
Reverse crunches are a highly effective exercise for targeting the lower abdominal muscles. By incorporating reverse crunches into your core workout routine, you can strengthen and sculpt your midsection, improve overall core stability, and enhance posture. In this section, we will guide you through how to perform reverse crunches correctly, explain the muscles they target, and offer tips for maximizing their effectiveness.
How to Do Reverse Crunches
To perform reverse crunches, follow these steps:
- Start by lying flat on your back, with your legs extended and your arms extended along your sides, palms facing down.
- Bend your knees and lift your legs, bringing them towards your chest until your knees are directly above your hips.
- Engage your core by drawing your navel in towards your spine.
- Keep your lower back pressed into the floor as you lift your hips off the ground, curling your tailbone towards your chest.
- At the top of the movement, squeeze your abs and hold for a moment before slowly lowering your hips back to the starting position.
Ensure a slow and controlled movement throughout the exercise to maximize its effectiveness.
Muscles Targeted by Reverse Crunches
Reverse crunches primarily target the lower abdominal muscles, specifically the rectus abdominis and the transverse abdominis. Here’s how these muscles are engaged:
-
Rectus Abdominis: The main function of the rectus abdominis, often referred to as the “six-pack” muscles, is to flex the spine. Reverse crunches place a strong emphasis on this muscle group, particularly the lower section.
-
Transverse Abdominis: The transverse abdominis, located deep within the core, provides stability and support to the spine. Reverse crunches engage this muscle to maintain proper alignment and control the movement.
Tips for Effective Reverse Crunches
To ensure that you perform reverse crunches effectively and safely, consider the following tips:
-
Focus on your form: Maintain proper form throughout the exercise. Keep your lower back pressed into the floor to avoid excessive strain, and concentrate on your lower abs as you lift your hips off the ground.
-
Engage your core: Prioritize engaging your core muscles, particularly the lower abs, as you lift your hips. Visualize pulling your bellybutton towards your spine and use your abdominal muscles to curl your tailbone towards your chest.
-
Control the movement: Avoid using momentum to swing your legs or relying on your hip flexors to lift your hips. Instead, focus on a slow and controlled motion, using your abs to initiate the movement and lift your hips off the ground.
-
Breathe properly: Coordinate your breathing with the motion. Exhale as you lift your hips, squeezing your abs at the top of the movement, and inhale as you lower your hips back to the starting position.
By incorporating reverse crunches into your core training routine, you can strengthen and tone your lower abs, improving your overall core strength and stability.
Recommended Frequency and Intensity
The frequency and intensity at which you perform these exercises will depend on your fitness level, goals, and overall exercise routine. In this section, we will provide general guidelines for how often to do the exercises, the ideal intensity, and the importance of rest and recovery.
How Often to Do the Exercises
To see noticeable improvements in strength, endurance, and muscle tone, it’s recommended to perform these exercises at least 2-3 times per week. However, the exact frequency will depend on your personal fitness goals and schedule.
If you’re new to these exercises or have limited time, you can start with a once-a-week routine, gradually increasing the frequency as your body adapts and becomes stronger. As you progress, aim to incorporate these exercises into your routine every other day or even daily, while allowing for adequate rest and recovery in between sessions.
Ideal Intensity of the Exercises
The ideal intensity for these exercises will again vary depending on your fitness level and goals. It’s important to work at a level that challenges you without compromising proper form and technique.
For beginners, it’s recommended to start with lighter weights or modified versions of the exercises until you feel comfortable and confident with the movements. As you become stronger and more experienced, gradually increase the resistance, duration, or repetitions to provide a greater challenge to your muscles.
Listen to your body and adjust the intensity as necessary. You should feel a moderate level of effort and fatigue during the exercises, but never to the point of pain or extreme discomfort.
Rest and Recovery Periods
Rest and recovery are crucial components of any exercise routine, as they allow your muscles to repair and grow stronger. While it’s important to challenge yourself during workouts, it’s equally important to give your body time to recover in order to avoid overtraining and injury.
In general, aim to have at least one rest day between strength training sessions targeting the same muscle groups. This allows your muscles to rest and rebuild, optimizing their response to exercise. On rest days, focus on activities that promote recovery, such as stretching, foam rolling, or low-impact cardiovascular exercises.
Also, prioritize getting enough sleep, eating a nutritious diet, and staying hydrated to support your body’s recovery and overall fitness goals.
Conclusion
Incorporating jumping burpees, bicycle crunches, kneeling vacuum, side plank, swimmers, Russian twists, woodchoppers, and reverse crunches into your fitness routine can have a significant impact on your strength, endurance, and overall fitness level. These exercises target multiple muscle groups, providing a well-rounded and effective workout for your core and entire body.
By following the instructions for each exercise, understanding the muscles they target, and implementing the provided tips, you can optimize your workout and achieve your fitness goals. Remember to start at your own pace, focus on proper form, and gradually increase the frequency and intensity as you become stronger.
Make sure to listen to your body, respect its need for rest and recovery, and maintain a balanced approach to exercise. Consistency, along with proper nutrition and quality sleep, will help you achieve the best results and improve your overall fitness and well-being. So go ahead, challenge yourself, and enjoy the benefits of these fantastic exercises!